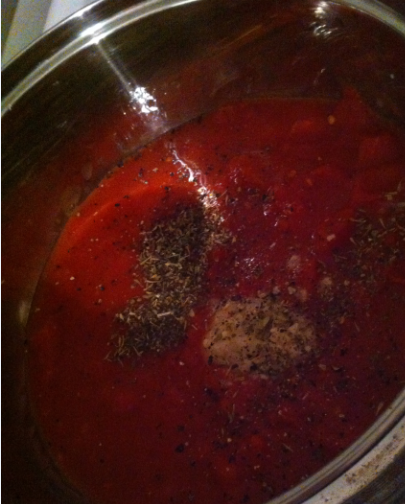
Weather you are a weight watcher or not it is always good to have a simple tomato sauce recipe handy. This is perfect to make in batches. You can then freeze it and have it to hand whenever you want to whip up a quick dish. It is such a versatile base sauce it can be used for a wide variety of recipes , especially pasta dishes. The flavorings in the recipe add depth while the touch of sugar helps to cut down the acidity of the tinned tomatoes.
This has a pro points value of 0
Ingredients:
400g Can of chopped tomatoes
1 Garlic clove crushed
1/2 Teaspoon of grated lemon zest
1/4 Teaspoon of mixed dry herbs
1 Teaspoon of caster sugar
Freshly ground black pepper
Method:
Place all ingredients into a lidded saucepan and bring to the boil. Cover and then simmer for 10 minutes, stirring once or twice. When finished simply use in your chosen recipe.
*This recipe is featured in "The Complete Kitchen" Weight watchers book.
Showing posts with label cooking. Show all posts
Tuesday, 20 January 2015
Thursday, 17 October 2013
Speedy Spaghetti Carbonara *Weight Watchers Friendly Recipe*
This is taken from the Weight Watchers 20 minute meals book but this super quick and easy meal isn't just for the weight watchers, this tasty and satisfying meal can be enjoyed by the whole family.
Propoints per recipe 38 - Propoints per serving 10
Serves 4 - If cooking for less people divide the ingredients as required.
Ingredients:
250g Spaghetti or linguine
Bunch of spring onions
150g Button mushrooms
Cooking spray or oil
1 Large garlic clove
1 Large egg
200g Low fat soft cheese
150ml Skimmed milk
15g Grated parmesan cheese - Or another cheese if preferred
100g Ham
Black pepper
Parsley to garnish.
Method:
Propoints per recipe 38 - Propoints per serving 10
Serves 4 - If cooking for less people divide the ingredients as required.
Ingredients:
250g Spaghetti or linguine
Bunch of spring onions
150g Button mushrooms
Cooking spray or oil
1 Large garlic clove
1 Large egg
200g Low fat soft cheese
150ml Skimmed milk
15g Grated parmesan cheese - Or another cheese if preferred
100g Ham
Black pepper
Parsley to garnish.
Method:
- Put the spaghetti or linguine into the saucepan and cover with plenty of boiling water from the kettle. Cook for 8-10 minutes or until just tender.
- Meanwhile, thinly slice the spring onions and mushrooms. Heat the frying pan and spray or add oil. Add the spring onions and mushrooms to the pan with a peeled and halved garlic clove and cook gently for 5 minutes until softened. Then discard the garlic clove (it is only added into the cooking to give flavor to the finished dish)
- Beat the soft cheese and egg together in a mixing bowl, then add the skimmed milk and half the cheese. Add the parsley (chopped/dried) and season with black pepper.
- Keep 2 tablespoons of the boiling water before draining the pasta into a colander. Return the pasta to the saucepan with the 2 tablespoons of water and stir in the egg mixture. Once mixed add in the mushrooms and onions and gently mix. Finally add in the chopped ham, return to a gentle heat for 5 minutes mixing occasionally.
- Serve with the remaining cheese sprinkled on top and some parsley if you wish.
Thursday, 3 October 2013
Gourmet Meals.. From A Microwave?
I love it when I have the chance to go to a nice restaurant and indulge in some top quality dishes. Being able to pick something sumptuous from the high class menu and enjoy every morsel because you know tomorrow you will be back to the bog standard quick meals you are so used to grabbing in between parents evenings, work, hair appointments or what ever else life throws at you. Being on Weight Watchers means that not only am I watching what I eat, but I am also planning my meals for the week ahead. I do try to be adventurous and try new recipes but half the time I just simply do not have enough minutes on the clock to indulge in a recipe that is going to take longer than 30 mins.
Here is a wonderful recipe idea.. Salmon and prawn crumble. Sounds devine doesn't it? I must admit when I heard the name I immediately thought "No, too complicated and time consuming". But what If I told you this gorgeous twist on the standard fish pie could be easily made using a microwave? I am not talking about those 2 minute meals where you pop a few holes in the film and then zap it, I am talking about actually creating a 5 star meal with a microwave and minimal effort.
In this video celebrity chef Jo Pratt shows you how to prepare this fishy delight using a Panasonic combination microwave oven.
With so many delicious meals you are able to cook from scratch in half the time, what will you make?
*This post is sponsored by Spreaditfast
Here is a wonderful recipe idea.. Salmon and prawn crumble. Sounds devine doesn't it? I must admit when I heard the name I immediately thought "No, too complicated and time consuming". But what If I told you this gorgeous twist on the standard fish pie could be easily made using a microwave? I am not talking about those 2 minute meals where you pop a few holes in the film and then zap it, I am talking about actually creating a 5 star meal with a microwave and minimal effort.
In this video celebrity chef Jo Pratt shows you how to prepare this fishy delight using a Panasonic combination microwave oven.
With so many delicious meals you are able to cook from scratch in half the time, what will you make?
*This post is sponsored by Spreaditfast
Tuesday, 25 June 2013
Butternut Squash ZERO Point Chips - Weight Watchers
I though zero point chips only existed in my dreams! But I have found a healthy alternative to chips and one that is just as tasty (even more so in my opinion)
I'm not a fan of soups so had never tried butternut squash before but I am now converted. For us weight watchers the butternut squash when baked is quite simply a zero point potato which Is a dream come true for us!
Method:
Start by preheating your oven to around 180-200 degrees.
First you need to cut/chip your butternut squash. You might struggle to cut the squash so zapping it in the microwave for 10 seconds before really helps. If like me you don't have a microwave then a decent set of knives will do the job.
I always use start by cutting the squash in half length ways. One half I keep in the fridge for another day (squash will be fine to store in a container for up to 5 days in the fridge when cut)
Next Take a spoon and scoop out the seeds.
At this stage you can peel the squash which is easy to do with a vegetable peeler. I personally like to keep the skins on when making chips or wedges for a more rustic texture/taste.
Cut your squash in half again width ways and then cut into desired sized chips or wedges.
Places them onto a baking tray and (if your a weight watcher) give them a few sprays of fry light oil, If you are not too worried about the oil then drizzle them with a little olive or vegetable oil.
Next choose some spices to add. I usually add salt, pepper, chili powder or paprika. I find this all taste amazing on squash chips.
Bake for around 20-25 minutes or until they start to crisp at the edges. Depending on how crispy and chip like you want them you can leave them in for longer or take them out sooner for a softer style chip.
...And thats it! Enjoy!
Let me know if you try them, and what you think :-)
Wednesday, 19 June 2013
Cookie Press Review - The Craft Company
Biscuits will always be my choice when I need something quick and easy to bake. Whether its for Aalliyahs class or a rainy day activity for her to do. Biscuits can be any flavor with almost anything thrown into the mix. I love that you can literally have thousands of combinations. Whats more Aalliyah has so much fun when it comes to using cookie cutters and other tools to make random shaped biscuits.
We were so excited to try out the Cookie Press from The Craft Company. It's a very simple concept. You simply fill the tube with your dough, pop in one of the 12 provided design discs and you're ready to go. I was able to fill the tube really easy, it wasn't fiddly or confusing. You simply unscrew and change the design disc as and when needed. It has a comfort grip handle which you press until you hear a click and it presses out a lovely shaped cookie. Some of the shapes are harder to master than the others and It does take a little bit of finessing to get the technique right but once you have the knack you can make lots of different shaped cookies in no time and at great ease. I made things harder for myself by using parchment paper as I couldn't for the life of me find my cookie trays. It still works but doesn't always stick well to the paper so sometimes wont form the shape and drop off the end. Even Aalliyah found it easy enough to use which was great as she loved getting involved.
I think this is a fantastic product and at under £11 its a bargain! Definitely a must for any kitchen. I can't wait to use it again. Fancy getting your hands on one yourself then head over to to The Craft Company where you will find lot more items at great prices. So if you need cake decorations, cake making equipment or even the ingredients, they have got you covered.
Monday, 15 April 2013
Tortilla Wrap Pizza - Weight Watcher Friendly
This is a must for all you pizza lovers! Pizza is not the best thing when you are counting points, but you can still enjoy the a delicious pizza with this recipe!
What you'll need:
1 Tortilla Wrap (3 pro points)
1-2 Tea spoons of tomato purée/pizza topping (0 pro points)
30g Grated Mozzarella Cheese (2 pro points)
3 Salami pieces (1 prop point)
**The above pro point values are dependant on size/brand used.
Method:
Take your wrap and lay flat.
Spread the purée thinly over the wrap with the back of the spoon. Make sure the entire wrap surface is covered.
Sprinkle the cheese over the wrap evenly and then finish by adding the salami pieces.
Place under a grill or in the oven for 5-10 minutes.
Cut up in quarters and enjoy!
**Cooking times may vary so keep an eye on you wrap pizza as they cook quickly due to the thin base.
This is a fantastic little recipe and one that you can tweak to your own personal tastes. Add a bit of anything you like to the top of the pizza!
What you'll need:
1-2 Tea spoons of tomato purée/pizza topping (0 pro points)
30g Grated Mozzarella Cheese (2 pro points)
3 Salami pieces (1 prop point)
**The above pro point values are dependant on size/brand used.
Method:
Take your wrap and lay flat.
Spread the purée thinly over the wrap with the back of the spoon. Make sure the entire wrap surface is covered.
Sprinkle the cheese over the wrap evenly and then finish by adding the salami pieces.
Place under a grill or in the oven for 5-10 minutes.
Cut up in quarters and enjoy!
**Cooking times may vary so keep an eye on you wrap pizza as they cook quickly due to the thin base.
This is a fantastic little recipe and one that you can tweak to your own personal tastes. Add a bit of anything you like to the top of the pizza!
Labels:
cooking,
food,
pizza,
recipe,
weight loss,
weight watchers,
ww
Tuesday, 2 April 2013
My Easter Break - In An Egg Shell
Ok, So we are done with the snow, ice and freezing cold temperatures of winter and Easter came to mark the beginning of spring, sunshine and an indication that summer was on its way! The only problem was that when I woke up on Easter Sunday morning ready to forget the diet for one whole day and devour everything anything in sight, I was greeted with the not so pleasant site of lingering snow which had been laying around taunting me and my thoughts of summer for days! Looking out of my window I could see the wooden bench in the garden topped with snow and my flower pots each with a frozen layer of ice. I turned around expecting to see gifts under the tree, not chocolate eggs and daffodils. Needless to say I was not dreaming of a white Easter and I'm pretty sure no one else had banked on it either given the sizzling temperatures this time last year.
Yes I realise I have moaned for a whole paragraph about the weather, but hey.. I'm british and thats what we do best!
Anyway, In spite of the weather, both myself and Aalliyah still managed to have a wonderful Easter as I hope you all did too. There was the typical roast dinner. I opted for a nice joint of pork for the ever so selfish reason that I hadn't had roast pork since starting weight watchers in October, so we were having it.. End of story!
Me and Aalliyah had lots of fun making some Easter inspired treats for her class, which she gave out on the last day of term, when she also came home with some goodies for winning first place in the egg decorating competition.
No Easter is complete without a bit of bonnet making.. Aalliyah also made her very own town called "Chick-ville"
Plus we had a beautiful Easter stroll in the Springsunshine snow. There is just something so "British" about seeing a beautiful blooming daffodil..poking out of 4 inches of snow!
Surely we have had the worst of it now? We have put up with an Arctic Winter and now Sprong (Spring gone wrong) Can we please just have a sizzling summer full of sunshine, sunshine and that other thing that went missing last year... Oh yes.. SUNSHINE!
Good luck to the first person that moans when it's too hot!! You know there will be someone!
How did you spend your Easter? I hope what ever you did you had a wonderful time celebrating.
Yes I realise I have moaned for a whole paragraph about the weather, but hey.. I'm british and thats what we do best!
Anyway, In spite of the weather, both myself and Aalliyah still managed to have a wonderful Easter as I hope you all did too. There was the typical roast dinner. I opted for a nice joint of pork for the ever so selfish reason that I hadn't had roast pork since starting weight watchers in October, so we were having it.. End of story!
Me and Aalliyah had lots of fun making some Easter inspired treats for her class, which she gave out on the last day of term, when she also came home with some goodies for winning first place in the egg decorating competition.
No Easter is complete without a bit of bonnet making.. Aalliyah also made her very own town called "Chick-ville"
Plus we had a beautiful Easter stroll in the Spring
Surely we have had the worst of it now? We have put up with an Arctic Winter and now Sprong (Spring gone wrong) Can we please just have a sizzling summer full of sunshine, sunshine and that other thing that went missing last year... Oh yes.. SUNSHINE!
Good luck to the first person that moans when it's too hot!! You know there will be someone!
How did you spend your Easter? I hope what ever you did you had a wonderful time celebrating.
Labels:
activities,
break,
chocolate,
cooking,
days out,
diet,
easter,
egg,
family,
health eating,
photography,
pics,
pictures,
spring,
weather
Monday, 1 April 2013
Chocolate Nest Cakes
These tasty crispy cakes are the perfect thing to make with the kids. Besides the melting of the chocolate, they need minimal supervision and will have a blast making them. They are perfect for Easter when topped with some mini eggs and really resemble a birds nest. Aalliyah has so much fun making them for her class as an end of term treat. Needless to say they all had a blast eating them too!!
What you will need:
Shredded Wheat (Approx 15 Biscuits)
300g Milk chocolate
Mini Eggs
Method:
Place the wheat biscuits into a large bowl and start crushing with your hands making sure not to leave any big bits in.
Next take the chocolate and break it up into a glass bowl, place the bowl over a saucepan of barely simmering water. Gently stir the chocolate as it melts until it is all melted.
Take the bowl off of the heat and place to one side. Next take your bowl of shredded wheat and gradually shake the contents into the bowl of chocolate gently stirring as you continue to pour all the wheat in until it is all evenly covered in chocolate.
** I found that pouring the wheat into the chocolate as opposed to the other way round was much easier as it didn't clump together and set to quickly.
Next take a table spoon and start filling up your cake cases, gently pressing them in the middle with the back of your spoon, making a nest shape. Top one or more mini eggs and then leave to set in the refrigerator for a minimum of 2 hours.
Then... Enjoy!
The great thing about this recipe is that you can add a bit of what ever you fancy.. Maybe add in a mix of dark and milk chocolate? Or add some dessicated coconut for added flavour.
This recipe makes approx 30 smallish crispy cakes, so alter the ingredients to make more or less.
What you will need:
Shredded Wheat (Approx 15 Biscuits)
300g Milk chocolate
Mini Eggs
Method:
Place the wheat biscuits into a large bowl and start crushing with your hands making sure not to leave any big bits in.
Next take the chocolate and break it up into a glass bowl, place the bowl over a saucepan of barely simmering water. Gently stir the chocolate as it melts until it is all melted.
Take the bowl off of the heat and place to one side. Next take your bowl of shredded wheat and gradually shake the contents into the bowl of chocolate gently stirring as you continue to pour all the wheat in until it is all evenly covered in chocolate.
** I found that pouring the wheat into the chocolate as opposed to the other way round was much easier as it didn't clump together and set to quickly.
Next take a table spoon and start filling up your cake cases, gently pressing them in the middle with the back of your spoon, making a nest shape. Top one or more mini eggs and then leave to set in the refrigerator for a minimum of 2 hours.
Then... Enjoy!
The great thing about this recipe is that you can add a bit of what ever you fancy.. Maybe add in a mix of dark and milk chocolate? Or add some dessicated coconut for added flavour.
This recipe makes approx 30 smallish crispy cakes, so alter the ingredients to make more or less.
Friday, 22 March 2013
Reasons To Be Cheerful #R2BC
Easter is almost upon us which means school holiday time again! Most parents do nothing but moan about there kiddies being off but I have to admit, I enjoy having Aalliyah at home and feel lost when she goes back to school after time off. (I must be mad!) I'm hoping to do alot of fun things in the holidays including the usual egg hunt, Easter crafts and some baking. Lets hope the weather is nice enough for some days out. Not even lots of heat, but just no snow would be great!
What has put a smile on your face this week?
Thursday, 8 November 2012
CeraKook Ceramic Knives
Since starting weight watchers, I have been eating a hundred times more healthy which means I am filling up on my fruit and veg all day everyday. But with so many new meals being cooked my kitchen knives are failing to cut the mustard when it comes to the chopping and slicing of all my vegetables. So when I heard about new CeraKook knives, I was keen to learn more about the product.
The ceramic knives are extremely durable and lightweight making them easy to handle, with a lesser risk of any "chopping" mishaps They are stain resistant and the ceramic coating on the blades make sure nothing sticks to the surface, making chopping and slicing all the more easier.
The knives are available to buy separately as well as in a set. Every kitchen should have a decent set of knives and you can't go wrong with the Cerakook range. They offer different sized knives for your different needs, from a 6 inch chef knife to a 3 inch paring knife. They also have a fantastic nifty peeler, making your fruit and veg a doddle to peel. The knives are available with a white or black coloured blade.
The site is fairly new and any orders currently placed online are "pre orders" as the knives are not ready to be shipped until the end of November. Hardly a long wait at all, but to compensate for the hold, CeraKook are offering up to 20% off their products. Meaning you could pick up this fantastic knife set for just £59.95! But hurry as they will soon shoot back up to full price!
They come in a beautiful presentation box, and if you spend more than £40 they are offering free UK delivery. So with Christmas round the corner these would make ideal gifts.
Check out the links below to see the latest offers
Labels:
buy online,
ceramic,
chopping,
christmas,
cooking,
gift ideas,
knives,
peeling,
recipes
Wednesday, 19 September 2012
Easy Peasy Pasta
Here is a fantastic little recipe for a tasty pasta dish. Easy to prepare and not time consuming, while still being healthy and using fresh ingredients.
Thanks to Karen over at The Mums To Do List for this great recipe.
1. Chop 1 onion (I use red) and add to pan with 1 tablespoon of oil.
2. Add 2 garlic cloves (sliced)...but if your children will cringe if they see a slice of garlic, crush it instead...they will never know!
3. Add 1 chopped red pepper. Again if kids are funny about peppers chop it really finely to hide it, or you could substitute for mushrooms, carrots, peas or courgette. In fact any veg that your children like could be added to give them another of their 5 a day.
4. Soften the above ingredients in the pan, then add a big handful of pancetta. If you can't find pancetta in the supermarket just buy streaky bacon and chop it up. Cook until pancetta browns a little.
5. Add half a teaspoon of fennel seeds if you like a bit of flavour, then 4 (chopped) fresh tomatoes and 400g of tinned tomatoes. Then a little water (about 75ml). Bring to a simmer and add 1 beef stock cube. You could season with salt and pepper, but if cooking for toddlers lay off the salt.
6. Allow the sauce to thicken on simmer, and once the pasta is cooked either spoon over the pasta, or you can mix the pasta into the sauce and serve.
7. Sprinkle with a little grated parmesan (or any cheese finely grated).
Mine differed only slightly from the above recipe. I omitted the fennel seeds (not a fan) and instead of peppers packed out the sauce with peas, green beans, carrots and sweetcorn. (Love my veggies)
Thanks to Karen over at The Mums To Do List for this great recipe.
1. Chop 1 onion (I use red) and add to pan with 1 tablespoon of oil.
2. Add 2 garlic cloves (sliced)...but if your children will cringe if they see a slice of garlic, crush it instead...they will never know!
3. Add 1 chopped red pepper. Again if kids are funny about peppers chop it really finely to hide it, or you could substitute for mushrooms, carrots, peas or courgette. In fact any veg that your children like could be added to give them another of their 5 a day.
4. Soften the above ingredients in the pan, then add a big handful of pancetta. If you can't find pancetta in the supermarket just buy streaky bacon and chop it up. Cook until pancetta browns a little.
5. Add half a teaspoon of fennel seeds if you like a bit of flavour, then 4 (chopped) fresh tomatoes and 400g of tinned tomatoes. Then a little water (about 75ml). Bring to a simmer and add 1 beef stock cube. You could season with salt and pepper, but if cooking for toddlers lay off the salt.
6. Allow the sauce to thicken on simmer, and once the pasta is cooked either spoon over the pasta, or you can mix the pasta into the sauce and serve.
7. Sprinkle with a little grated parmesan (or any cheese finely grated).
Mine differed only slightly from the above recipe. I omitted the fennel seeds (not a fan) and instead of peppers packed out the sauce with peas, green beans, carrots and sweetcorn. (Love my veggies)
Clean plates all round and safe in the knowledge we have had our 5 a day :-)
Subscribe to:
Posts (Atom)