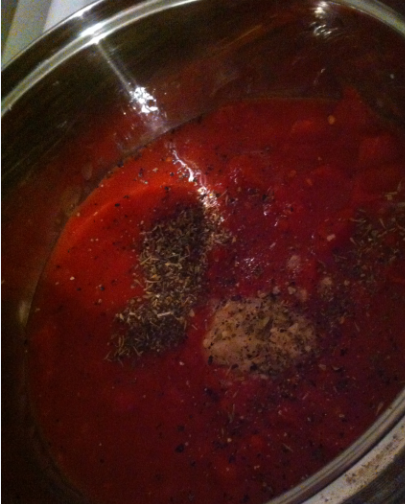
Weather you are a weight watcher or not it is always good to have a simple tomato sauce recipe handy. This is perfect to make in batches. You can then freeze it and have it to hand whenever you want to whip up a quick dish. It is such a versatile base sauce it can be used for a wide variety of recipes , especially pasta dishes. The flavorings in the recipe add depth while the touch of sugar helps to cut down the acidity of the tinned tomatoes.
This has a pro points value of 0
Ingredients:
400g Can of chopped tomatoes
1 Garlic clove crushed
1/2 Teaspoon of grated lemon zest
1/4 Teaspoon of mixed dry herbs
1 Teaspoon of caster sugar
Freshly ground black pepper
Method:
Place all ingredients into a lidded saucepan and bring to the boil. Cover and then simmer for 10 minutes, stirring once or twice. When finished simply use in your chosen recipe.
*This recipe is featured in "The Complete Kitchen" Weight watchers book.
Showing posts with label recipe. Show all posts
Tuesday, 20 January 2015
Sunday, 9 November 2014
Weight Watchers Fajita Stir And Season Pots *Review*
As most of you know I am a current "Weight Watcher" and I am always looking for simple but tasty meals ideas and was really keen to try the new Weight Watchers stir and season pots. I absolutely love fajitas. A meal where you can bung it a bit of what ever you fancy is right up my street and you can add or take away ingredients as you wish. I do tend to stick to the basics with my fajitas though and use the standard chicken, onions and peppers.
On first inspection I did think the pots seemed rather small and given that I was making enough for both myself and Aalliyah did fear that they would be no where near enough. I couldn't have been more wrong. The sauce seems to coat everything evenly and spread so far that it could have easily stretched out on another few servings. I also didn't feel the need to add any extra sauce to my fajitas as it was quite a wet seasoning.
At just 1 pro point per pot these are the perfect addition to give your fajitas an amazing flavour. Simply pop on in when frying your chicken and you're good to go. Minimal effort and maximum taste. I will definitely be buying these again. Not only do they taste amazing but they are also fantastic value for money at only £1.50 for four pots. 10/10 for us :)
Labels:
fajitas,
foodie,
ingredients,
meal ideas,
recipe,
review,
weight watchers
Tuesday, 1 April 2014
Spicy Quorn Chicken Jambalaya
This is a gorgeous Cajun style recipe. Perfect for when you fancy something a bit spicy and it's so quick and simple to make. I make this regularly and whats great about this recipe is you can choose to add or take out what ever you like, such as substituting the quorn for chicken, or adding in some different vegetables. Plus for all you fellow Weight Watchers out there, this recipe serves 4 and is 10pp a serving.
Ingredients:
250G Brown Rice (You can choose white if you prefer)
1 Large red onion
3 Sweet bite peppers (I like to use one of each colour)
Button Mushrooms - Chopped (As many as you would like)
Cherry Tomatoes Halved (As many as you would like)
Frylight Oil Spray (Or regular oil)
2 Teaspoons of Cajun Seasoning or Paprika
1/2 Teaspoon of Chilli Powder More if you like it hot!)
500g Quorn Chicken Style pieces
Fresh ground black pepper
Method:
Start by preparing your rice. Depending on the type of rice you are cooking , methods and times will vary.
Once your rice is on. Gently heat your frying pan adding some sprays of your oil. Add in the chopped mushrooms, onion and peppers. (Chopped small - No big bites)
about 4 minutes then add in your quorn chicken pieces. Next add in your spices (I also like to add a few chilli flakes at this point) and continue to stir fry together until the quorn cooks through, is coated and starts to brown. Be careful not to let the food stick. The coating will get slightly sticky, make sure you constantly toss/stir to prevent sticking. Now chuck in your halved tomatoes for the last few seconds or stir frying.
Next you want to add in your cooked rice and give the mixture a really good mix, making sure you are scraping all the spice residue from the pan and getting the rice nice and coated. Season with some ground pepper and add one more dash of Cajun seasoning to the mix. Give it a gentle stir fry for a few minutes and serve immediately.
Saturday, 23 November 2013
Corned Beef Bolognese - Princes Recipe Challenge
I was recently contacted by the wonderful people at Princes who were looking for bloggers to take part in a recipe challenge. As a mum I am always on the look out for quick and simple meal ideas which are equally affordable yet healthy. I was eager to take part and received some samples of Princes 3 new corned beef flavors that are now available. Corned beef with Chilli , mustard and onions. Typically when cooking with corned beef, people usually do a corned beef hash or stew so I was eager to try something different. The rules were simple, to cook up a quick and tasty dish using only the corned beef samples and other ingredients costing only £5 or less and it had to be done in 20 minutes or less.
So I decided I was going to make a super simple corned beef bolognese. Yes, different I know and not what you would normally associate corned beef with but if you never try new things you will never know if you like them!
So I went with the corned beef with chilli as I like a little kick to my meals. Here are my other ingredients used:
I make that a grand total of just £2.14 (loose onion cost 20 pence) for all the extra ingredients.. Even the seasoning!!
Method:
Start by gently frying the chopped onion and a few crushed garlic cloves.
When they start to soften and brown, add in the corned beef (roughly diced)
Gently fry the ingredients until the corned beef starts to soften and cook.
Add in the chopped tomatoes and a dash of herbs and leave simmering for 10-15 mins stirring once or twice.
After 10 minutes add spaghetti to a pan of already boiling water.
Once pasta is cooked drain and serve immediately with the bolognese mixture on top.
Then simply enjoy!
This meal was a big hit with my fussy eater and has been requested for dinner again and given that it cost so little I will gladly oblige!
All these new flavors will are now available in Sainsburys stores nationwide at £1.99 rrp.
*I was sent a sample pack including various flavors and a gift card for the purpose of purchasing ingredients. All thoughts and recipe ideas are 100% honest and my own.
Labels:
challenge,
corned beef,
dish,
family,
food,
meal ideas,
meals,
princes,
quick recipes,
recipe,
review
Thursday, 17 October 2013
Speedy Spaghetti Carbonara *Weight Watchers Friendly Recipe*
This is taken from the Weight Watchers 20 minute meals book but this super quick and easy meal isn't just for the weight watchers, this tasty and satisfying meal can be enjoyed by the whole family.
Propoints per recipe 38 - Propoints per serving 10
Serves 4 - If cooking for less people divide the ingredients as required.
Ingredients:
250g Spaghetti or linguine
Bunch of spring onions
150g Button mushrooms
Cooking spray or oil
1 Large garlic clove
1 Large egg
200g Low fat soft cheese
150ml Skimmed milk
15g Grated parmesan cheese - Or another cheese if preferred
100g Ham
Black pepper
Parsley to garnish.
Method:
- Put the spaghetti or linguine into the saucepan and cover with plenty of boiling water from the kettle. Cook for 8-10 minutes or until just tender.
- Meanwhile, thinly slice the spring onions and mushrooms. Heat the frying pan and spray or add oil. Add the spring onions and mushrooms to the pan with a peeled and halved garlic clove and cook gently for 5 minutes until softened. Then discard the garlic clove (it is only added into the cooking to give flavor to the finished dish)
- Beat the soft cheese and egg together in a mixing bowl, then add the skimmed milk and half the cheese. Add the parsley (chopped/dried) and season with black pepper.
- Keep 2 tablespoons of the boiling water before draining the pasta into a colander. Return the pasta to the saucepan with the 2 tablespoons of water and stir in the egg mixture. Once mixed add in the mushrooms and onions and gently mix. Finally add in the chopped ham, return to a gentle heat for 5 minutes mixing occasionally.
- Serve with the remaining cheese sprinkled on top and some parsley if you wish.
Friday, 3 May 2013
Delicious - Magazine Review
Delicious magazine offers readers so much more than your typical "foodie" magazine. Not only is it bursting with mouthwatering recipes and meal ideas, its also packed full of indispensable articles from healthy eating to the top ten must have kitchen gadgets, not to mention all the stunning food photography! This is a definite must have magazine for anyone who enjoys spending time in the kitchen.
At first I was concerned that like a lot of other magazines in a similar genre, the magazine would be full of adverts and that when it came down to it, the actual content would be a tiny amount. I couldn't have been more wrong. Yes, there were adverts but these were few and far between, and each one relevant to the magazines niche.
I fully recommend this magazine, whether you cook a little or a lot, there is something for everyone inside!
Why not head over to "Lets Subscribe" where you can subscribe to this and many other magazines and even bag yourself a massive saving in the process! The cover price of this magazine is £3.80 and worth every penny. But you can save up to 31% through a 12 month subscription.
At first I was concerned that like a lot of other magazines in a similar genre, the magazine would be full of adverts and that when it came down to it, the actual content would be a tiny amount. I couldn't have been more wrong. Yes, there were adverts but these were few and far between, and each one relevant to the magazines niche.
I fully recommend this magazine, whether you cook a little or a lot, there is something for everyone inside!
Monday, 15 April 2013
Tortilla Wrap Pizza - Weight Watcher Friendly
This is a must for all you pizza lovers! Pizza is not the best thing when you are counting points, but you can still enjoy the a delicious pizza with this recipe!
What you'll need:
1 Tortilla Wrap (3 pro points)
1-2 Tea spoons of tomato purée/pizza topping (0 pro points)
30g Grated Mozzarella Cheese (2 pro points)
3 Salami pieces (1 prop point)
**The above pro point values are dependant on size/brand used.
Method:
Take your wrap and lay flat.
Spread the purée thinly over the wrap with the back of the spoon. Make sure the entire wrap surface is covered.
Sprinkle the cheese over the wrap evenly and then finish by adding the salami pieces.
Place under a grill or in the oven for 5-10 minutes.
Cut up in quarters and enjoy!
**Cooking times may vary so keep an eye on you wrap pizza as they cook quickly due to the thin base.
This is a fantastic little recipe and one that you can tweak to your own personal tastes. Add a bit of anything you like to the top of the pizza!
What you'll need:
1-2 Tea spoons of tomato purée/pizza topping (0 pro points)
30g Grated Mozzarella Cheese (2 pro points)
3 Salami pieces (1 prop point)
**The above pro point values are dependant on size/brand used.
Method:
Take your wrap and lay flat.
Spread the purée thinly over the wrap with the back of the spoon. Make sure the entire wrap surface is covered.
Sprinkle the cheese over the wrap evenly and then finish by adding the salami pieces.
Place under a grill or in the oven for 5-10 minutes.
Cut up in quarters and enjoy!
**Cooking times may vary so keep an eye on you wrap pizza as they cook quickly due to the thin base.
This is a fantastic little recipe and one that you can tweak to your own personal tastes. Add a bit of anything you like to the top of the pizza!
Labels:
cooking,
food,
pizza,
recipe,
weight loss,
weight watchers,
ww
Monday, 1 April 2013
Chocolate Nest Cakes
These tasty crispy cakes are the perfect thing to make with the kids. Besides the melting of the chocolate, they need minimal supervision and will have a blast making them. They are perfect for Easter when topped with some mini eggs and really resemble a birds nest. Aalliyah has so much fun making them for her class as an end of term treat. Needless to say they all had a blast eating them too!!
What you will need:
Shredded Wheat (Approx 15 Biscuits)
300g Milk chocolate
Mini Eggs
Method:
Place the wheat biscuits into a large bowl and start crushing with your hands making sure not to leave any big bits in.
Next take the chocolate and break it up into a glass bowl, place the bowl over a saucepan of barely simmering water. Gently stir the chocolate as it melts until it is all melted.
Take the bowl off of the heat and place to one side. Next take your bowl of shredded wheat and gradually shake the contents into the bowl of chocolate gently stirring as you continue to pour all the wheat in until it is all evenly covered in chocolate.
** I found that pouring the wheat into the chocolate as opposed to the other way round was much easier as it didn't clump together and set to quickly.
Next take a table spoon and start filling up your cake cases, gently pressing them in the middle with the back of your spoon, making a nest shape. Top one or more mini eggs and then leave to set in the refrigerator for a minimum of 2 hours.
Then... Enjoy!
The great thing about this recipe is that you can add a bit of what ever you fancy.. Maybe add in a mix of dark and milk chocolate? Or add some dessicated coconut for added flavour.
This recipe makes approx 30 smallish crispy cakes, so alter the ingredients to make more or less.
Sunday, 21 October 2012
Quorn Tikka Masala With Bulgar Wheat (WW Friendly)
A delicious meal and very Weight Watcher friendly at only 9 pro points total meal value.
Using the Weight Watcher Tikka Masala Sauce.
This is what I call a "bung it in" recipe. So if you are not hot on a certain ingredient you can replace with something else and put in whatever you fancy.
Start by gently frying off some mushrooms for 2-3 minutes.
When they start to turn golden brown add in your frozen Quorn Chicken
pieces. (100g = 3 pro points)
Gently fry off until chicken pieces are cooked through.
Next pour in your Weight Watchers Tikka sauce (Half a jar = 3 pro points)
Gently stir ensuring all chicken pieces are covered, turn down heat and allow to heat through until you are ready to serve.
Preparing the bulgar wheat...
To cook bulgar wheat you use 5.5 parts water to 1 part bulgar wheat.
Start by measuring out your bulgar wheat. (60g Dry = 3 prop points)
Place your water in a pan (with stock if required) and bring to boil.
When boiling put the wheat into the water, cover and turn down, letting it simmer for approx 15 minutes, or until all the water has absorbed.
When ready leave pan to stand for 10 minutes, gently fluff up with a fork and serve.
Add some vegetables on the side to complete your meal and remember if you are a "Weight Watcher" fill your plate with your zero heroes.
Using the Weight Watcher Tikka Masala Sauce.
This is what I call a "bung it in" recipe. So if you are not hot on a certain ingredient you can replace with something else and put in whatever you fancy.
Start by gently frying off some mushrooms for 2-3 minutes.
When they start to turn golden brown add in your frozen Quorn Chicken
pieces. (100g = 3 pro points)
Next pour in your Weight Watchers Tikka sauce (Half a jar = 3 pro points)
Preparing the bulgar wheat...
To cook bulgar wheat you use 5.5 parts water to 1 part bulgar wheat.
Start by measuring out your bulgar wheat. (60g Dry = 3 prop points)
When boiling put the wheat into the water, cover and turn down, letting it simmer for approx 15 minutes, or until all the water has absorbed.
When ready leave pan to stand for 10 minutes, gently fluff up with a fork and serve.
Add some vegetables on the side to complete your meal and remember if you are a "Weight Watcher" fill your plate with your zero heroes.
Labels:
quick meals,
quorn,
recipe,
tikka,
veggie,
weight watchers,
weightwatchers,
ww
Wednesday, 19 September 2012
Easy Peasy Pasta
Here is a fantastic little recipe for a tasty pasta dish. Easy to prepare and not time consuming, while still being healthy and using fresh ingredients.
Thanks to Karen over at The Mums To Do List for this great recipe.
1. Chop 1 onion (I use red) and add to pan with 1 tablespoon of oil.
2. Add 2 garlic cloves (sliced)...but if your children will cringe if they see a slice of garlic, crush it instead...they will never know!
3. Add 1 chopped red pepper. Again if kids are funny about peppers chop it really finely to hide it, or you could substitute for mushrooms, carrots, peas or courgette. In fact any veg that your children like could be added to give them another of their 5 a day.
4. Soften the above ingredients in the pan, then add a big handful of pancetta. If you can't find pancetta in the supermarket just buy streaky bacon and chop it up. Cook until pancetta browns a little.
5. Add half a teaspoon of fennel seeds if you like a bit of flavour, then 4 (chopped) fresh tomatoes and 400g of tinned tomatoes. Then a little water (about 75ml). Bring to a simmer and add 1 beef stock cube. You could season with salt and pepper, but if cooking for toddlers lay off the salt.
6. Allow the sauce to thicken on simmer, and once the pasta is cooked either spoon over the pasta, or you can mix the pasta into the sauce and serve.
7. Sprinkle with a little grated parmesan (or any cheese finely grated).
Mine differed only slightly from the above recipe. I omitted the fennel seeds (not a fan) and instead of peppers packed out the sauce with peas, green beans, carrots and sweetcorn. (Love my veggies)
Clean plates all round and safe in the knowledge we have had our 5 a day :-)
Monday, 17 September 2012
Lemon Drizzle Cake
Here is a great recipe for a scrummy "Lemon drizzle cake". I would love to say that it's mine but it is actually one belonging to the fabulous Nigella Lawson. Made this last week and it went down extremely well, much like the 2nd and 3rd slice (naughty).
The recipe can be found in the book: How to be a domestic Goddess - Nigella Lawson
Lemon-Syrup Loaf Cake
125g unsalted butter
175g caster sugar
2 large eggs
zest of 1 lemon
175g self raising flour
pinch of salt
pinch of salt
4 tablespoons milk
23x13x7cm loaf tin buttered and lined
For the syrup:
Juice of 1 and a half lemons
100g icing sugar
For the glaze:
Juice of 1/2 a lemon
150g icing sugar
For the glaze:
Juice of 1/2 a lemon
150g icing sugar
To Make The Cake:
Preheat your oven to 180 C/ gas mark 4.
Butter and line your loaf tin well.
Cream together butter and sugar and add eggs and lemon zest, beating them in well.
Gently fold in the flour and the salt, mixing thoroughly and then add the milk.
Spoon the batter into your prepared tin and bake for 45 mins or until cake tester comes out clean.
For the syrup:
Put the lemon juice and icing sugar into a small saucepan and heat gently until the sugar dissolves.
As soon as cake is out of oven, puncture all over with skewer and pour over the syrup.
Leave cake to cool completely before removing from the tin.
For the glaze:
Combine lemon juice and icing sugar until smooth and white, add a little more icing sugar if needed. Make sure your cake is completely cool before drizzling with the glaze.
Here's one I made earlier :-) It tasted to die for and was very simple to make. :-)
Subscribe to:
Posts (Atom)